Googles Being Fussy Please Try Again or Join With Your Email Below
Would yous like to utilise your Gmail or Google Workspace (formerly One thousand Suite) account to ready email delivery issues on your site? WP Post SMTP'south Google Workspace / Gmail option uses Google's API to securely authenticate your site'south emails, helping them to arrive successfully in your users' inboxes.
In this tutorial, we'll evidence you how to set up WP Postal service SMTP using the Google Workspace / Gmail mailer with your Gmail or Google Workspace email address.
- What Is Google Workspace/Gmail?
- Installing and Configuring the WP Mail SMTP Plugin
- Creating a Spider web App in Your Google Account
-
- Creating or Choosing a Projection
- Enabling the Gmail API
- Creating Your Application'due south Credentials
- Configuring Your OAuth Consent Screen
- Configuring Scopes (Optional)
- Setting Up Your OAuth Client ID
-
- Updating the Publishing Status From Testing to Product
- Granting Your Site Google / Gmail Permissions
- Sending a Test Email
- Oft Asked Questions
What Is Google Workspace/Gmail?
Google Workspace/Gmail is a free mailer that enhances deliverability using Google's secure API. Information technology works with your existing Gmail or Google Workspace account.
Google'southward API tends to have more restrictions than our recommended mailers. For instance, its server requirements are more than strict. Y'all volition need to contact your hosting provider if your site doesn't meet these requirements, or if meet any issues.
- Cost: Gratis. Yet, please notation that Google volition not allow large numbers of emails to be sent via its API. For more details, check out Google'due south email limit page.
- From Email Requirements: Can be used with Google Workspace email addresses, Google Workspace aliases, Gmail addresses, or Gmail aliases at a custom domain. For more details, please run into our total tutorial on using an alias with the Gmail mailer.
- Bottom Line: Google's Gmail API is only offered every bit gratuitous service, then you won't exist charged at whatsoever fourth dimension. However, if you practise attain its limits, it simply will not send your emails. Its API is also less reliable than the other API-based mailer options.
Installing and Configuring the WP Postal service SMTP Plugin
Before getting started, you lot'll demand to install and actuate the WP Mail service SMTP plugin.
Once you've verified your license, you're ready to configure the plugin's settings. You lot tin can find them by going to WP Mail SMTP » Settings and looking nether the Full general tab.
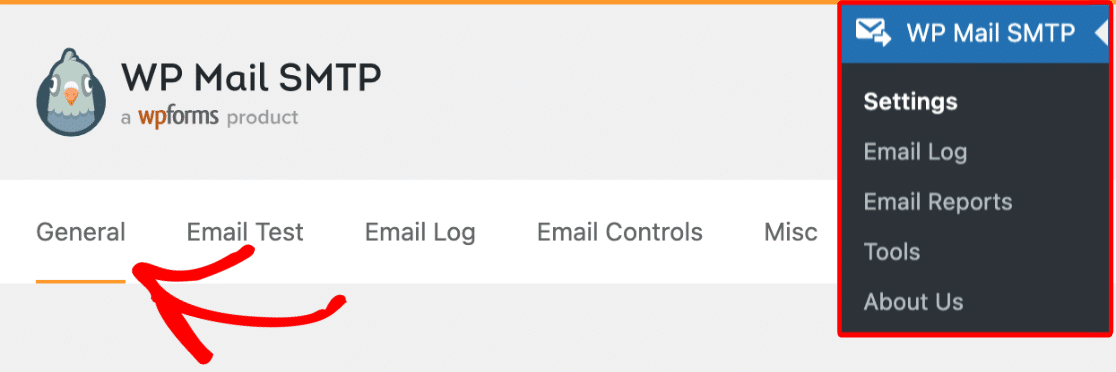
Below, we'll comprehend the settings needed for this setup.
From Electronic mail
This is the email address that all of your site'southward emails volition exist sent from. You tin can type your email address into the field provided or select the email address yous'd like to use (including whatsoever aliases you've configured) from the dropdown that appears after you lot connect your site to the Gmail API in later steps.

TheForce From Electronic mail pick will brand it so all the emails sent from your site come from the accost you lot've entered or selected.
Notation: In guild to utilize multiple Gmail aliases throughout your WordPress site equally the From Email address, brand certain to leave the Force From E-mail box unchecked.
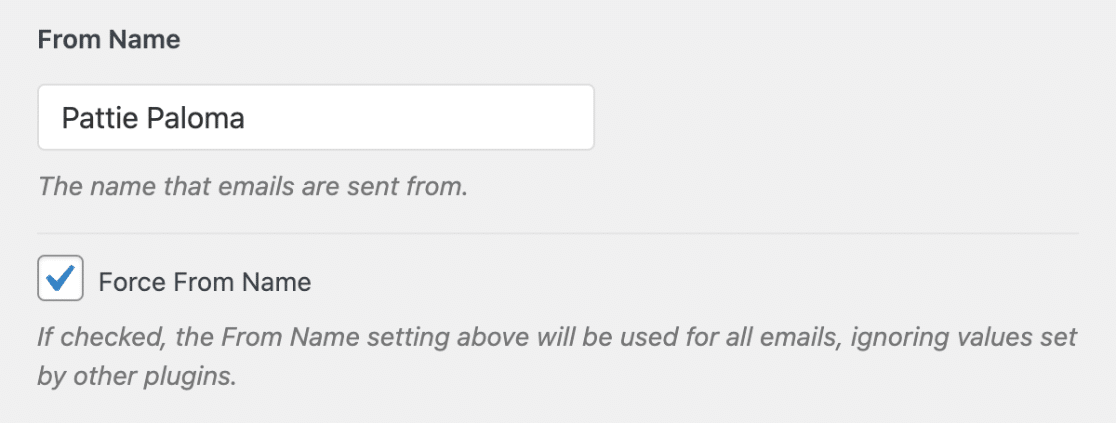
From Name
Below the From Email, you lot can set up the From Name. This is the proper name associated with the emails your site sends out. By default, information technology will be set to your site'southward proper name, but you can adjust it to annihilation you'd like.
Y'all can also check the Force From Name option to apply this setting site-wide.
Mailer
This is where you tin can cull which mailer y'all'd similar your site to utilise. Select the Google / Gmail option.

Once yous've chosen this mailer, you should encounter a new section announced titled Google / Gmail. In this department, there are settings labeledCustomer ID and Client Hugger-mugger.

To generate the data yous demand for these fields, yous'll need to employ your Google business relationship to create a web application. This process doesn't require whatsoever coding, and nosotros'll show yous exactly what to do in the next step.
You'll be coming back to WP Postal service SMTP's settings page a little later, so for the side by side pace, open a new tab or window in your browser.
Creating a Web App in Your Google Account
In the new tab or window you've opened, log in to your Google account and open your Google Deject Console.
Notation: Earlier continuing, be certain to sign out of all other Google accounts besides the account you'll be using for the SMTP setup.
Besides, if yous're using Google Workspace, make sure that the Google account yous use has permission to send emails (in other words, access to its ain inbox).
If it's your outset time using Google Cloud Console, you may run across a popup asking you to select your country and agree to the Terms of Service. Go alee and do and then, then click on AGREE AND Go along to move on to the next footstep.

If you've logged in to the Google Deject Console before, you'll likely bypass the Terms of Service.
Creating or Choosing a Project
First, yous'll need to cull a project to use for your app. You can select an existing one or create a new ane.
To do so, click on the projects dropdown in the toolbar at the meridian of your dashboard.

In the popup that appears, select an existing project from the list or click onNew Project in the tiptop right corner.

If you selected an existing projection, move on to the adjacent step. For a new project, enter a project proper name and select an organisation and location from the dropdowns.

Then click on theCREATE button.
Enabling the Gmail API
Side by side, you demand to enable the Gmail API for your project. In your Google Cloud Panel sidebar, become toAPIs & Services » Library.
Then look underCategory and click onEmail, or enter "Gmail API" in the search bar.

Click on theGmail API outcome.

On the Gmail API page, click on the blueEnable push.

Creating Your Application'southward Credentials
After you enable the Gmail API, you lot should be redirected to the Gmail API Overview page. Here, click on the CREATE CREDENTIALS button.

On the side by side page, Google volition inquire a few questions to determine the Credential Type you need. From the Select an API dropdown, choose Gmail API.
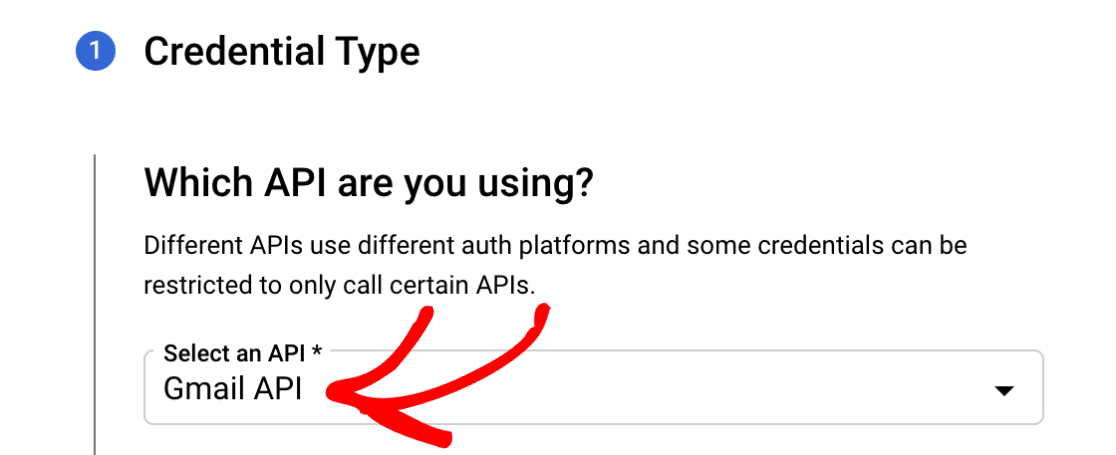
Note: If you don't see an option for the Gmail API in the dropdown, be certain that you have the Gmail API enabled for your account.
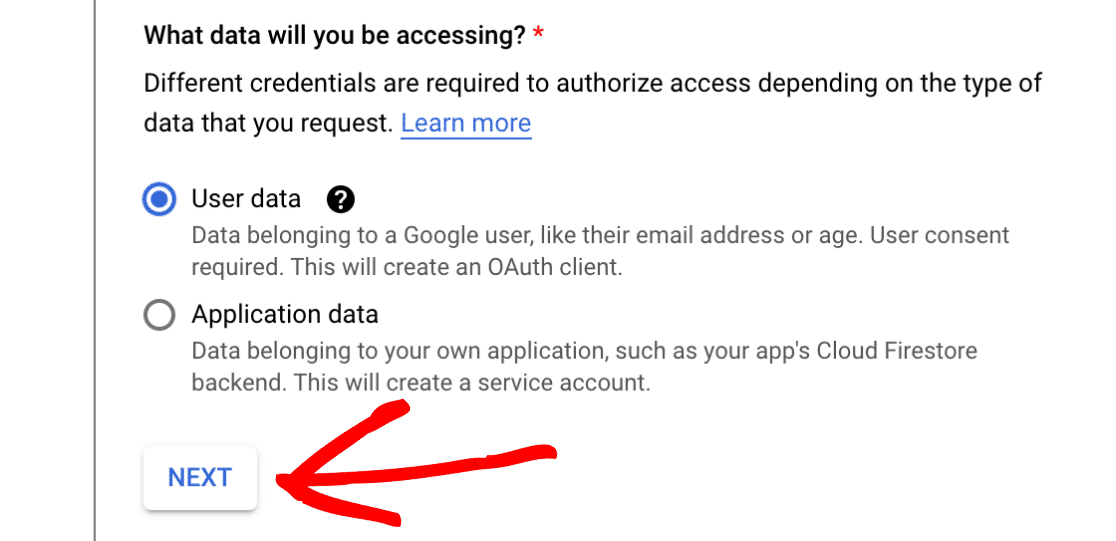
Next, under What information will you be accessing?, select the User information option. And so click the NEXT button to go along.
Configuring Your OAuth Consent Screen
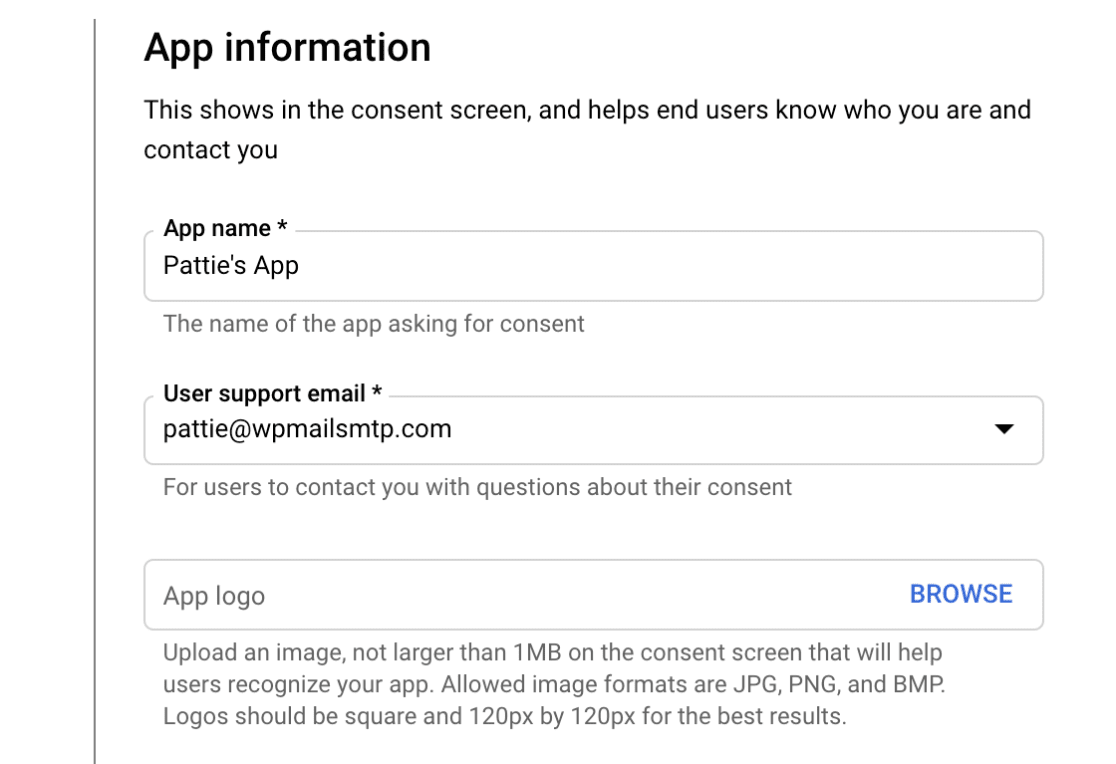
Google will so ask for some basic data about your app.
This section is mostly for personal use since no one else will exist using your app. Withal, some fields are still marked equally required:
- App name: Enter an app name of your pick (e.g., Pattie's App).
- User support e-mail: Select your email address from the choices provided.
- App logo: If yous'd like, you tin upload a logo for your app. This is optional.
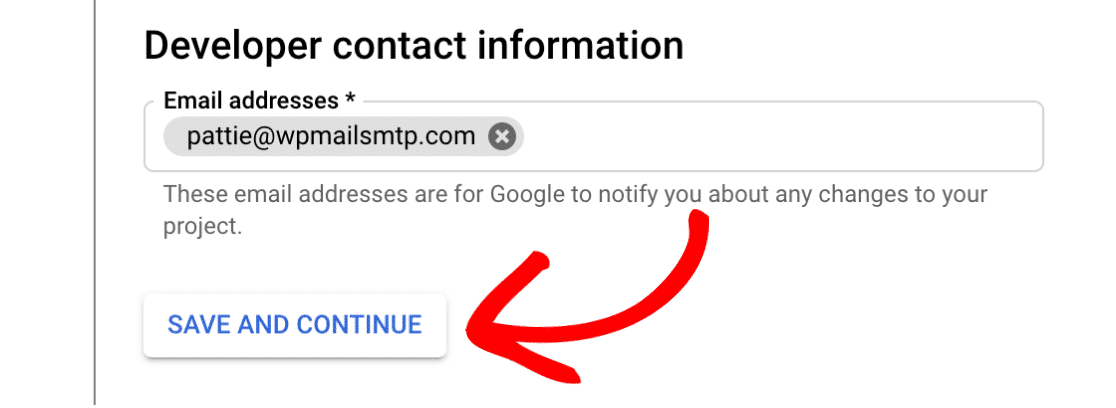
Finally, add your email address in the E-mail addresses field. Then click on the Relieve AND CONTINUE button to proceed to the side by side step.
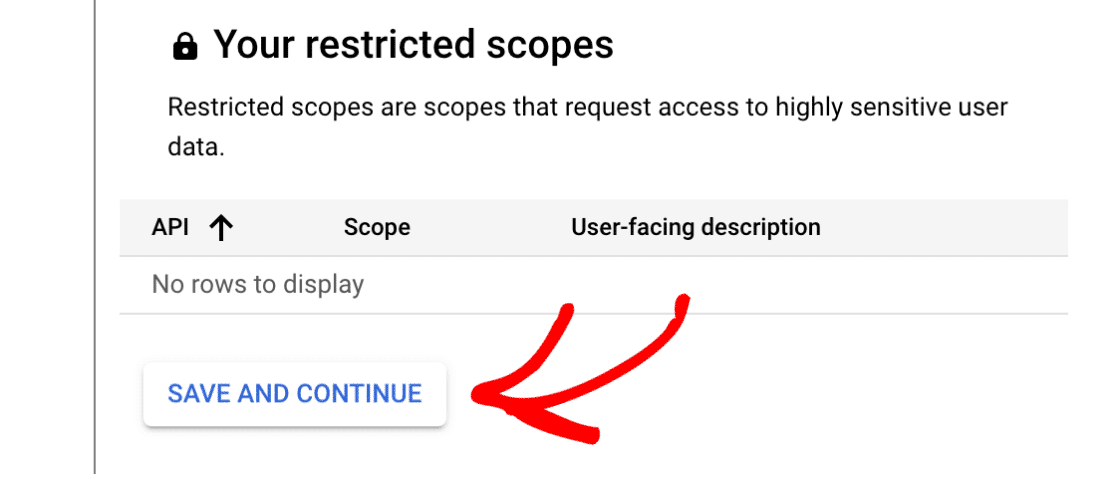
Configuring Scopes (Optional)
This is an optional step that we volition be skipping for this tutorial. Scroll downward to the end of the Scopes section and click on the SAVE AND Go alongbutton to proceed.
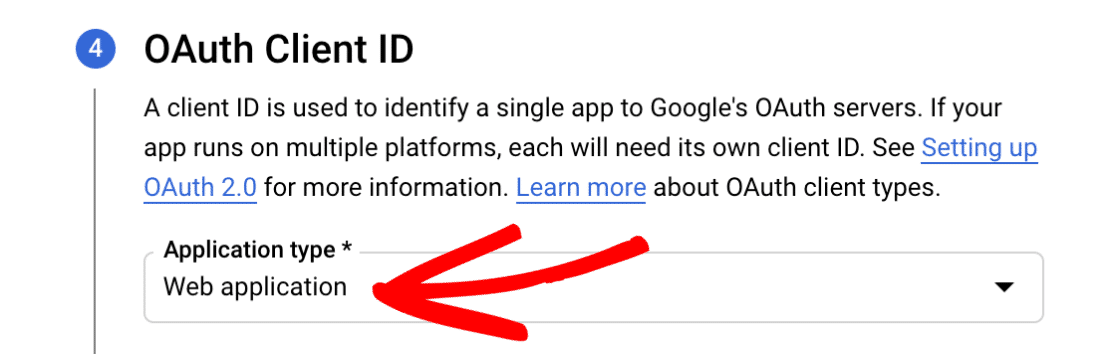
Setting Upwards Your OAuth Client ID
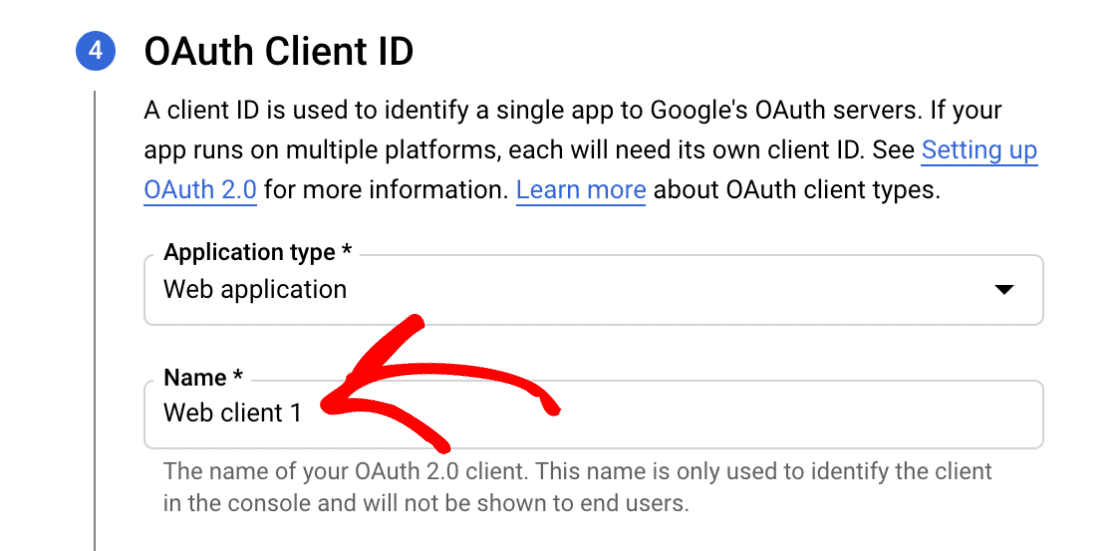
Next, you'll need to fill out some information almost your OAuth Client ID.
From the Application type dropdown, select the Web application option. Once you lot do so, more fields will automatically populate.
You can go out the Proper noun field every bit the default value or change information technology to something more relevant. For this example, we'll proceed the default name, Web client one.
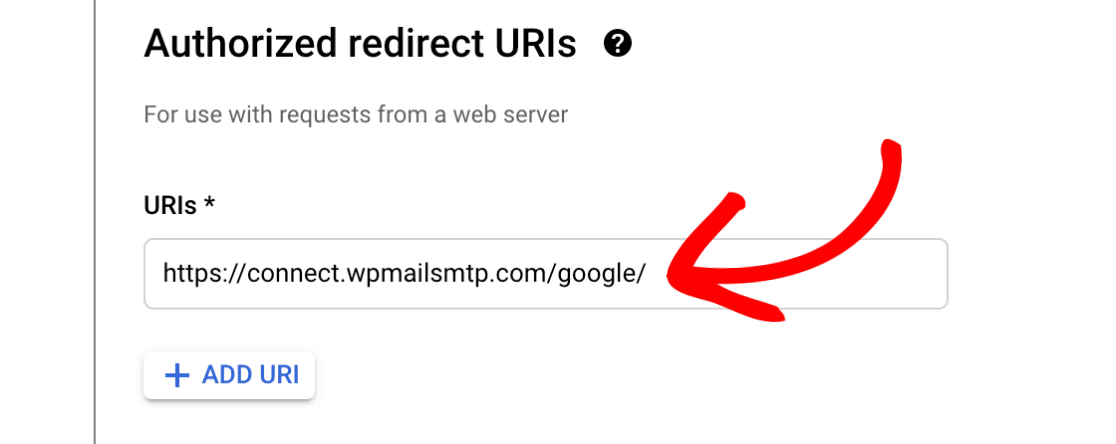
Next, skip the Authorized JavaScript origins department and coil to Authorized redirect URIs.
Click on the + Add together URI button and input the following: https://connect.wpmailsmtp.com/google/. You can as well re-create this value from your WP Mail service SMTP settings and paste it here if you prefer.
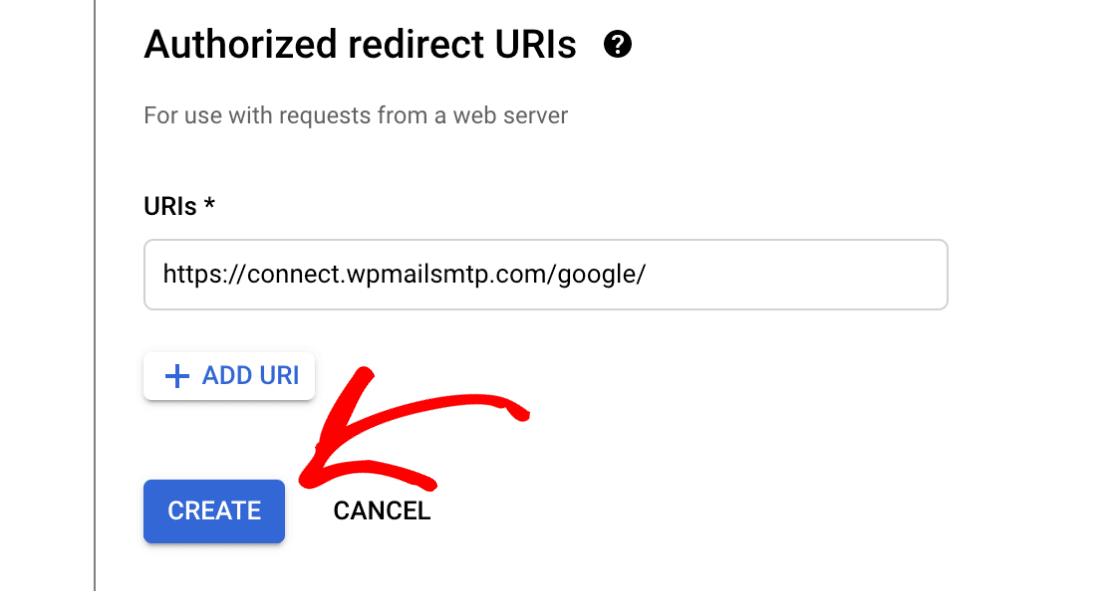
And so click on the CREATE push button to consummate this step.
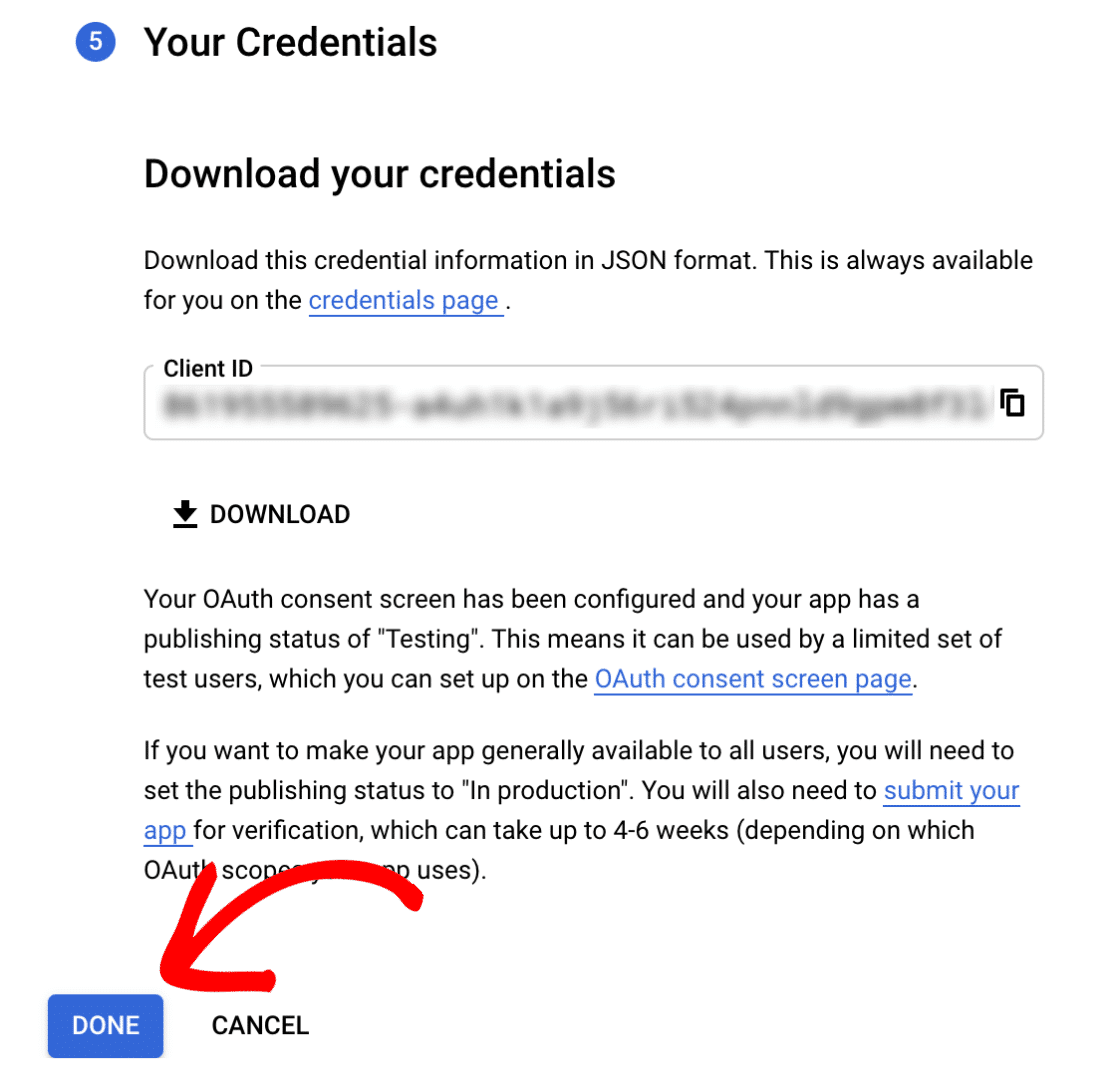
Once your app has been created, theYour Credentials section volition expand to show y'all your Client ID. There's no demand to copy it now, as you'll access information technology from another area in a after footstep.
Instead, go alee and click the DONE button at the bottom of the page.
Updating the Publishing Status From Testing to Production
Google will put your app into Internal mode by default. Information technology's really important that you switch it to External mode and publish it. Otherwise, your app will be super limited and won't function properly.
In your Google Cloud Panel sidebar, go to APIs & Services » OAuth consent screen. UnderUser Type, click on theMake External push.

In the popup window that appears, select theIn production option. Then click on Ostend.

Once confirmation is complete, you'll see that your app'due south Publishing status is now In production.

Granting Your Site Google / Gmail Permissions
Side by side, click on Credentials in the left side menu.
Once you're on the Credentials page, in the OAuth two.0 Client IDs section you tin can meet the details of the web application you but created. To view the Client ID and Client Hole-and-corner, click the pencil icon.
![]()
This will open all of the details for your app. On the right side of this folio, y'all'll see the Client ID and Client cloak-and-dagger values.
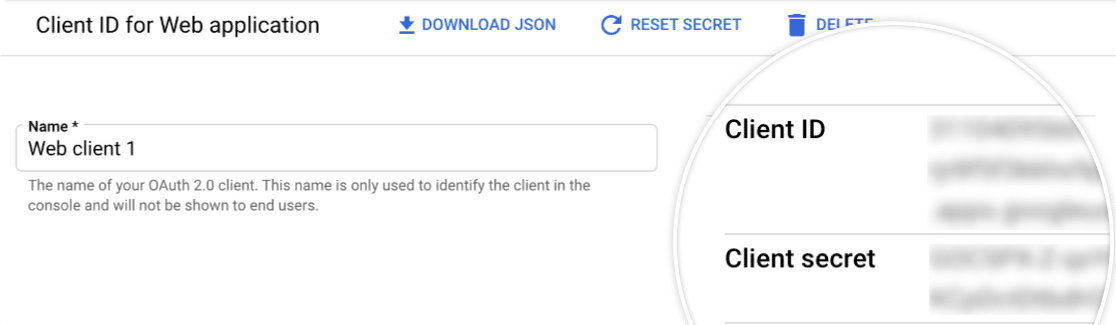
Go alee and re-create both of these values into the respective fields in your WP Mail SMTP settings.

Note: Exist very careful not to re-create any extra text or spaces with your Client ID or Customer Secret, equally this volition result in an mistake in the next pace.
Once y'all've added these values, click the Relieve Settings button at the lesser of the page.
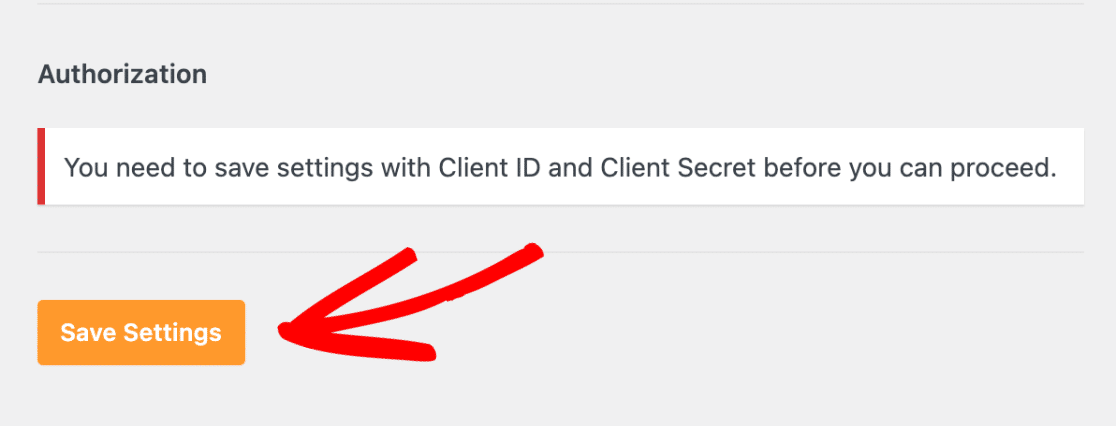
Afterward saving your settings, the page will refresh. You must grant permission earlier Google allows our plugin to employ your Gmail API to send emails.
To do this, scroll to the bottom of the WP Mail SMTP settings folio and click the push labeled Allow plugin to transport emails using your Google account.

This will open a login screen for Google. Go alee and log in to the account you're setting up SMTP with.
Next, you'll see a screen asking for permission for this site to send emails on your behalf.
When y'all're ready, click the Allow button to proceed.

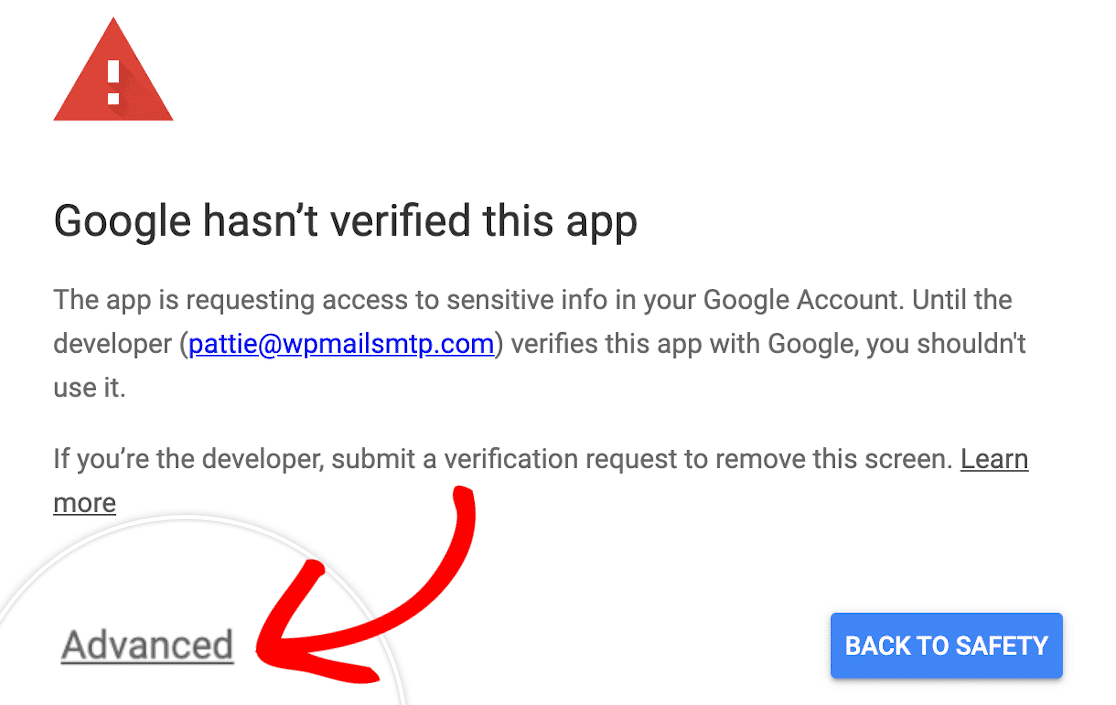
Bypassing Google's Verification Warning (Free Gmail Users Only)
If y'all are connecting with a free Gmail account you might see the following screen. Get ahead and click on the Advanced link in the bottom left corner.
In the expanded section, click on Go to wpmailsmtp.com (unsafe). Don't worry, Google only displays this warning because information technology hasn't verified your app. In that location is no need to verify it since you lot created this app simply for your own utilize.
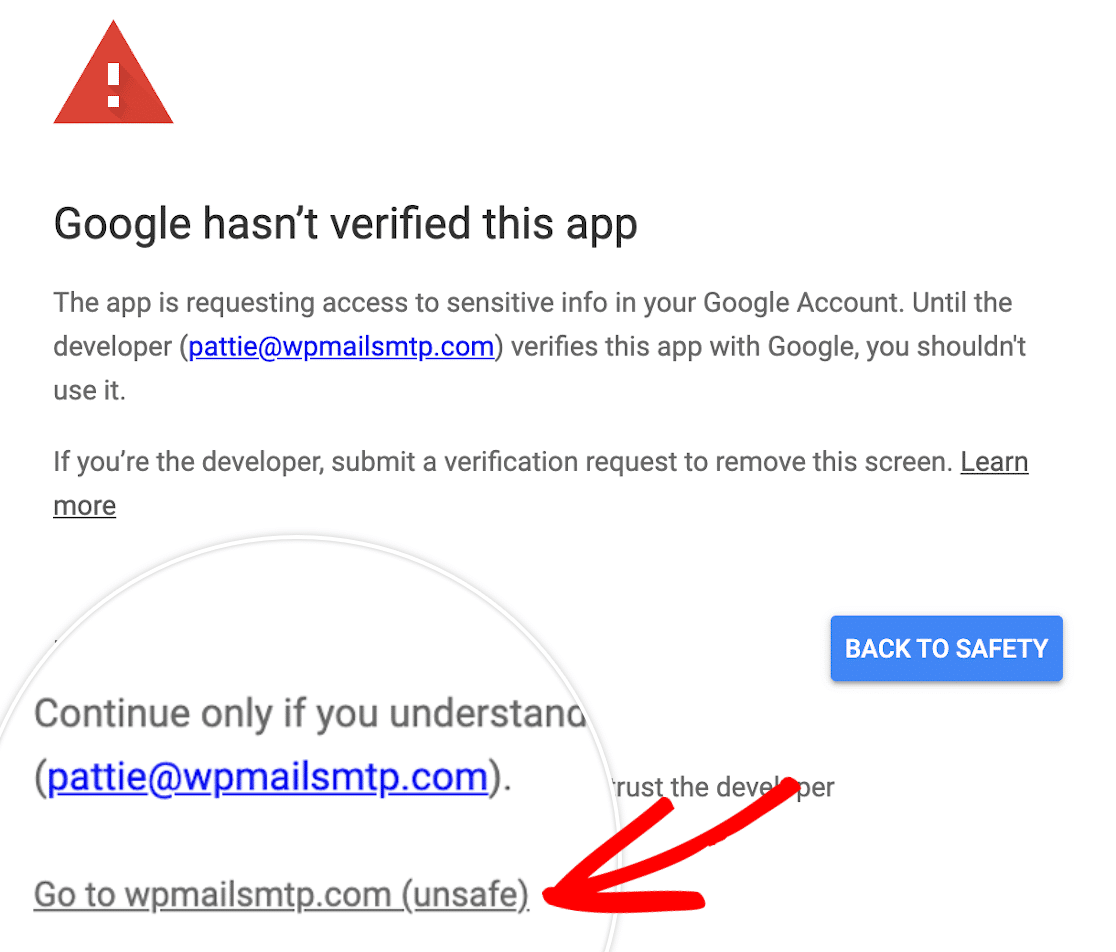
So click on theAllow button as shown to a higher place.
Sending a Examination Email
Next, you'll be returned to your WP Mail SMTP settings and a success message will exist displayed. Once the connection is consummate, you're prepare to transport a test electronic mail. To practise so, navigate to WP Post SMTP » Tools and open up the Email Exam tab.

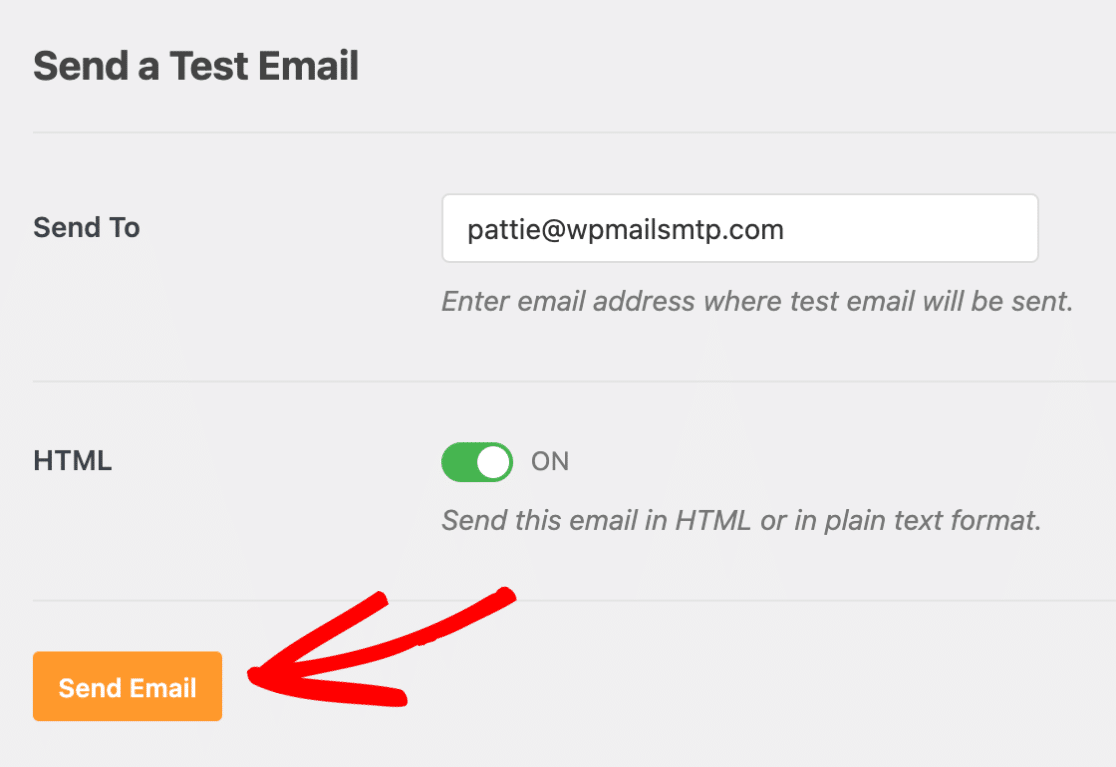
One time the Email Test tab is open, you lot'll demand to enter an electronic mail address whose inbox yous have access to. Unless yous're sure y'all'll only send obviously text emails from your site, we recommend leaving theHTML settingON. So click the Send Email button.
When the test electronic mail has been sent, you'll see a success message.

You should also soon receive the test electronic mail at the e-mail address y'all entered.

Frequently Asked Questions
These are some of the top questions we receive virtually setting upward the Google Workspace / Gmail mailer.
What if the examination email doesn't send successfully?
If the SMTP exam email isn't able to send, a debug log will appear with additional details. Here are some of the possible error messages and how to resolve them.
401. That's an fault.
                  Error: invalid_client
This error appears when the Client ID isn't able to be read properly. To ready information technology, try copying and pasting your Client ID again and check that there'south no whitespace or actress text.
400. That's an error.
                  Error: invalid_request
                  Missing required parameter: client_id
This error will display when the Client ID field is empty or not able to be read properly. To fix it, try copying and pasting your Customer ID once again and bank check that there'south no whitespace or extra text.
curl error 60: SSL certificate trouble
This message means that the server is missing a certificate that's required for SMTP to work. To fix this, you'll need to contact your site'southward hosting provider to ask them to install this certificate (virtually likely the cacert.pem certificate, though it's all-time to ask your host to bank check).
"code": 401,
                  "message": "Login Required"
If you run into this in the debug message, yous however need to grant permission for WP Post SMTP to admission your Google account. For instructions on how to fix this, please meet Step 4 of this tutorial. Also, be sure to check that the From Email in your SMTP settings matches the email used to set up your Google app.
Request Entity Too Big
                  Error 413
If you're seeing this error, information technology's probable that files existence sent through your forms exceed Gmail's limit for direct file attachment in emails. This limit is applied to the sum of the message's text as well every bit the encoded attachment. To prevent this error, you'll demand to make certain that all files are no larger than 22 MB.
In that location was a trouble while retrieving Auth for gmail: Could not json decode the token
This error is a possible indicator that another plugin (such as UpdraftPlus) is loading a unlike version of Google's API on the site, creating a conflict. If possible, the conflicting plugin should be deactivated. Otherwise, it'south recommended that y'all prepare upwardly a different mailer.
If none of the above apply, or the test e-mail nevertheless isn't working, your Google business relationship may have the Gmail API disabled. To cheque on this, follow Google'south guide to enabling an API.
What if I see a screen that says "This app isn't verified"?
When you click the Permit plugin to ship emails using your Google business relationship push button in your WP Mail SMTP settings, Google might brandish a screen that says, "This app isn't verified. This app hasn't been verified by Google nonetheless. Only proceed if yous know and trust the programmer."
There's no need to worry, though. This message is only referring to the app that you created in your own Google account, so you are actually the developer in this instance.
To bypass this message, click Advanced and then click Get to wpmailsmtp.com (unsafe).
What if I desire to switch to a different email later?
If you'd similar to change to a different Gmail or Google Workspace electronic mail accost, you'll demand to repeat all the tutorial steps to a higher place. This includes generating a new Client ID and Customer Secret nether this other email business relationship.
When yous get to the Authorization step (Pace four), relieve your settings and click the Remove Connection button. This will remove the authorization for your original email account and allow yous to repeat the authorization steps with your new email.

Does the Google Workspace / Gmail mailer back up aliases?
Yes, equally of July 2020, WP Post SMTP supports Gmail aliases. For more details on how to prepare an alias in Google, bank check out its guide on how to send emails from an alias.
Can I use the Google Workspace / Gmail mailer if I accept two Cistron Hallmark (2FA) enabled on my Google account?
You can definitely apply 2 Factor Authentication with WP Mail SMTP's Google Workspace / Gmail option. However, it'southward important to note that if y'all choose to disable 2FA, or change the countersign on your account, yous'll need to go through the setup process once again.
When authorizing my app, I get the post-obit error bulletin:
Error 403: access_denied. The developer hasn't given you access to this app.
This message means that your app's permissions are set to the testing mode in Google Deject.
To fix this, exist certain to switch the manner from testing to production and attempt authorizing your app one more time.
Do I need to submit my app to Google for verification in social club for it to work with WP Post SMTP?
Information technology isn't required for you to submit your app for verification. Nonetheless, yous're welcome to do so if yous'd similar. If you cull to submit your app for verification, y'all can continue the authorization procedure in WP Mail SMTP without waiting for Google'southward verification.
That'south it! Now you know how to set WP Mail SMTP'due south Google Workspace / Gmail mailer on your WordPress site.
Next, would you like to know how to effectively troubleshoot issues in WP Post SMTP? Be certain to cheque out our tutorial on troubleshooting WP Mail SMTP for more than details.
Source: https://wpmailsmtp.com/docs/how-to-set-up-the-gmail-mailer-in-wp-mail-smtp/
0 Response to "Googles Being Fussy Please Try Again or Join With Your Email Below"
Post a Comment